|
The standard setup
The standard ignition system used by the Alfa boxer engine in
the Sprint is an electronic Bosch unit, which uses a part mechanical distributor with a
hall effect reluctor trigger, and a conventional coil.
Inputs to it are: +12 volts switched
supply from ignition switch
trigger sensing connection from distributor
The coil also has +12 volts supplied to it, and a low tension
connection from the electronic ignition box. In addition, it outputs a signal to the
Tachometer on the drivers instrument panel. This wire is green with a yellow tracer on it,
and is common with the low tension connection.
A standard HT king lead then feeds the centre of the
conventional distributor cap, and a conventional rotor arm then feeds the spark voltage to
the individual HT leads. The rotor arm is fitted with a spring loaded moveable contact,
which acts as a centrifugally operated rev limiter.
The advance curve of the distributor is pre-set, and only
vacuum advance adjustment is available.
Conversion ignition system
The new system is a distributorless fully electronic solid
state setup.
This setup comprises the following components:
Twin double ended coil unit
Electronic Control Unit
Water temperature sensor
Air temperature sensor
Throttle position sensor
Crank angle / position sensor
Crank speed sensor
The coil unit is a solid state unit comprising two parallel
coils, each with two outputs. When triggered, each coil outputs two sparks. By connecting
these coils to plugs in the cylinders which are at top dead centre at the same time, the
cylinder on the firing stroke is ignited, and the cylinder on the exhaust stroke simply
wastes the spark generated. This is the wasted spark principle.
As a result of this setup, each coil must be individually
triggered, and the timing of this is controlled by an electronic 'brain'.
The 'brain' is the Emerald M3D ECU, which also controls the
injection. This takes inputs from the sensors listed above. The crank sensor enables the ECU to determine
at which angle the crankshaft is at, and at what speed. Using these inputs, the ECU is
then able to look at RPM, throttle demand, water temperature and air temperature to
calculate exactly what the correct advance is. It does this by looking at a three
dimensional 'map', which plots advance against throttle load and RPM. Additional
correction factors for temperature and cold start requirements are then superimposed on
these values.
Once the ECU has determined when
the spark is required, it then triggers the appropriate coil. The coils are connected
directly to the spark plugs, so no HT king lead or distributor is required. It is a simple
system to physically install.
The 'map' referred to earlier is one
which is determined by actually running the engine on a dynamometer, either and engine
dyno, or more frequently a rolling road.
Physically installing the
distributorless system
Please refer to the fuel
system section for installation of the ECU.
What you will require are
A dual double-ended coil ignition pack, probably from a Mondeo or Escort zetec engine
(mine was a 1800 MkV escort 16v unit). REMEMBER to get a piece of the wiring loom complete
with connector!! Ford does not sell this separately.
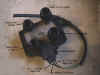
the Zetec coil unit
A three way male/female electrical
connector
Either 4 off No1 cylinder plug leads from a 1991 1800 Escort, or a pack of plug lead
adapters (a photo of these is below)
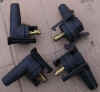
the Zetec coil adapters required for the
HT leads
You will also need to supply a
switched +12 volt supply and some wire to connect the ECU to the coil.
The zetec double ended coil is fitted so that at the same time as cylinder no 1 is firing
on its firing stroke, the spark plug for cylinder no 2 will be firing on its exhaust
stroke, and ditto for cylinders 3 and 4. Before anyone writes to me to tell me that it
should be 1 and 4, and 2 and 3, remember that the boxer has an unusual firing order of
1-3-2-4, rather than the normal 1-3-4-2.
The +12v line is connected to the
centre wire of the coil connection. The ECU pin for the no.1 cylinder is connected to the
wire on the side of the coil connector marked 1 and 4, and the remaining ignition coil ECU
pin is connected to the remaining coil wire.
A separate feed goes to the tachometer, but you can connect the green/yellow tacho wire
from the existing system direct to the ECU tacho output. It works fine with the standard
tacho fitted to the car.
The ECU will automatically sense the
crank position from the crank sensor, so you do not have to worry about setting the timing
in the conventional sense. Once the car is running, it will be adjusted using the PC
software.
Oh, by the way, when you remove the distributor, remember to blank off the hole!
That's the theory, now does it
work....?
After all this is the interesting
task of trying to get the car to at least fire up.
Once all this injection and distributor-less
ignition hardware had been fitted, I had to try to make it all work together. I attempted
to use the instructions that come with the EMS to get the engine running.
The EMS came programmed with a basic, safe fuel and
ignition map from a similar sort of engine, perhaps from a 1.6 or 1.8 ford Zetec. The
engine did not want to run using this, point blank. After many hours of trying, I decided
to take a step back and simplify the system in order to attempt to diagnose why it
wouldn't run.
I had previously stated that I might run into
problems, and that as a contingency I could stick on the carbs and the distributor. Well,
that proved to be my saviour, or at least some of it did. I could not very easily stick
the carbs on because it would mean a change of fuel pump, plus devising a means of
attaching the throttle pot to the carbs. The distributor, however, could simply be bolted
back into place, and the connections remade by re-attaching the spade connectors.
This I did, and with the help of a can of 'Easy
Start' and the lap top, we tried again. Squirting the Easy Start in while cranking showed
that the engine wanted to run. By richening the mixture VERY considerably, it finally
burst into life. It seems that the fuel required by the engine was considerably more than
he engine was getting using this map and fuel pressure.
However, once I had the fuel mapping at a point where
the engine was happier, I attempted to refit the distributorless system. The engine would
now run, but was a pig to start, and it was obvious that my crank sensor was not helping.
It seems that the output signal from the sensor was not very strong at low speeds (below
1000 rpm), and the ECU was not able to consistently read from it. As a result, the speed
site information was switching between 0 and site 2, with the result that the injection
and ignition was being switched on and off. This results in an erratic idle and poor
running characteristics at low speed.
The ECU sensitivity can be increased to compensate
for this, but will have to be done at Emerald in London, at the same time as the rolling
road mapping is performed. As an interim measure, the distributor ignition has been
refitted and the car currently runs using this.
Notes
Just a few comments regarding general ignition
related issues.
Firstly, spark plugs; the ones fitted are the Golden Lodge
multiple electrode type. I have used both these and standard electrode plugs on Alfa Boxer
engines with absolutely no apparent difference in
the way the engine runs. Any comments or findings from anyone who has some experience of
different plugs in 16v engines would be appreciated.
Secondly, the plugs are a bastard to get at. No ifs,
no buts, they are buried well into the heads, and the chassis rail stops you getting full
access to them. They are impossible to see with the engine in the car without the use of a
mirror. Getting the plug leads on and off them is also a thankless task. The rears are
even worse than the fronts, and the fronts are pigs. My recommendation is to change or
check the plugs at every opportunity that the engine is out or dropped down.
You will need to devise some fiendishly clever bit of
tooling to get them out, just in case you need to. I used a Halfords plug socket, plus a 3
inch long extension bar and a slimline ratchet or tommy bar. This was satisfactory, but I
will be making a purpose built tool as access to the rear plugs is difficult even with
this.
| 
